Wednesday, December 19, 2012

Final Project


 I learned how to use my digital camera in this course. It was a beautiful thing to finally understand all the buttons and what they did. I was taught how to do everything from changing my iso to making sure my white balance was adjusted properly. Everything was laid out in this course that a camera can do and how the user can change those settings. Now knowing my camera better and being able to adjust those shots is how I was able to make the beautiful shots in this post. I believe this course is a must take for any photographer just starting out and any hobbyist who just wants to learn more!   
             The five pictures I chose are all leaf related. I find macro and nature photography my favorite styles. I applied different techniques in each of these pictures. One style I didn’t use in these pictures but which I had a lot of fun with during the class was black and white. I didn’t want to remove the beautiful color out of any of the pictures. I think in a leaf’s journey the color kind of helps tell the story. However with as much as I liked the black and white photography, I was still tempted! However I believe all the shots in the post 
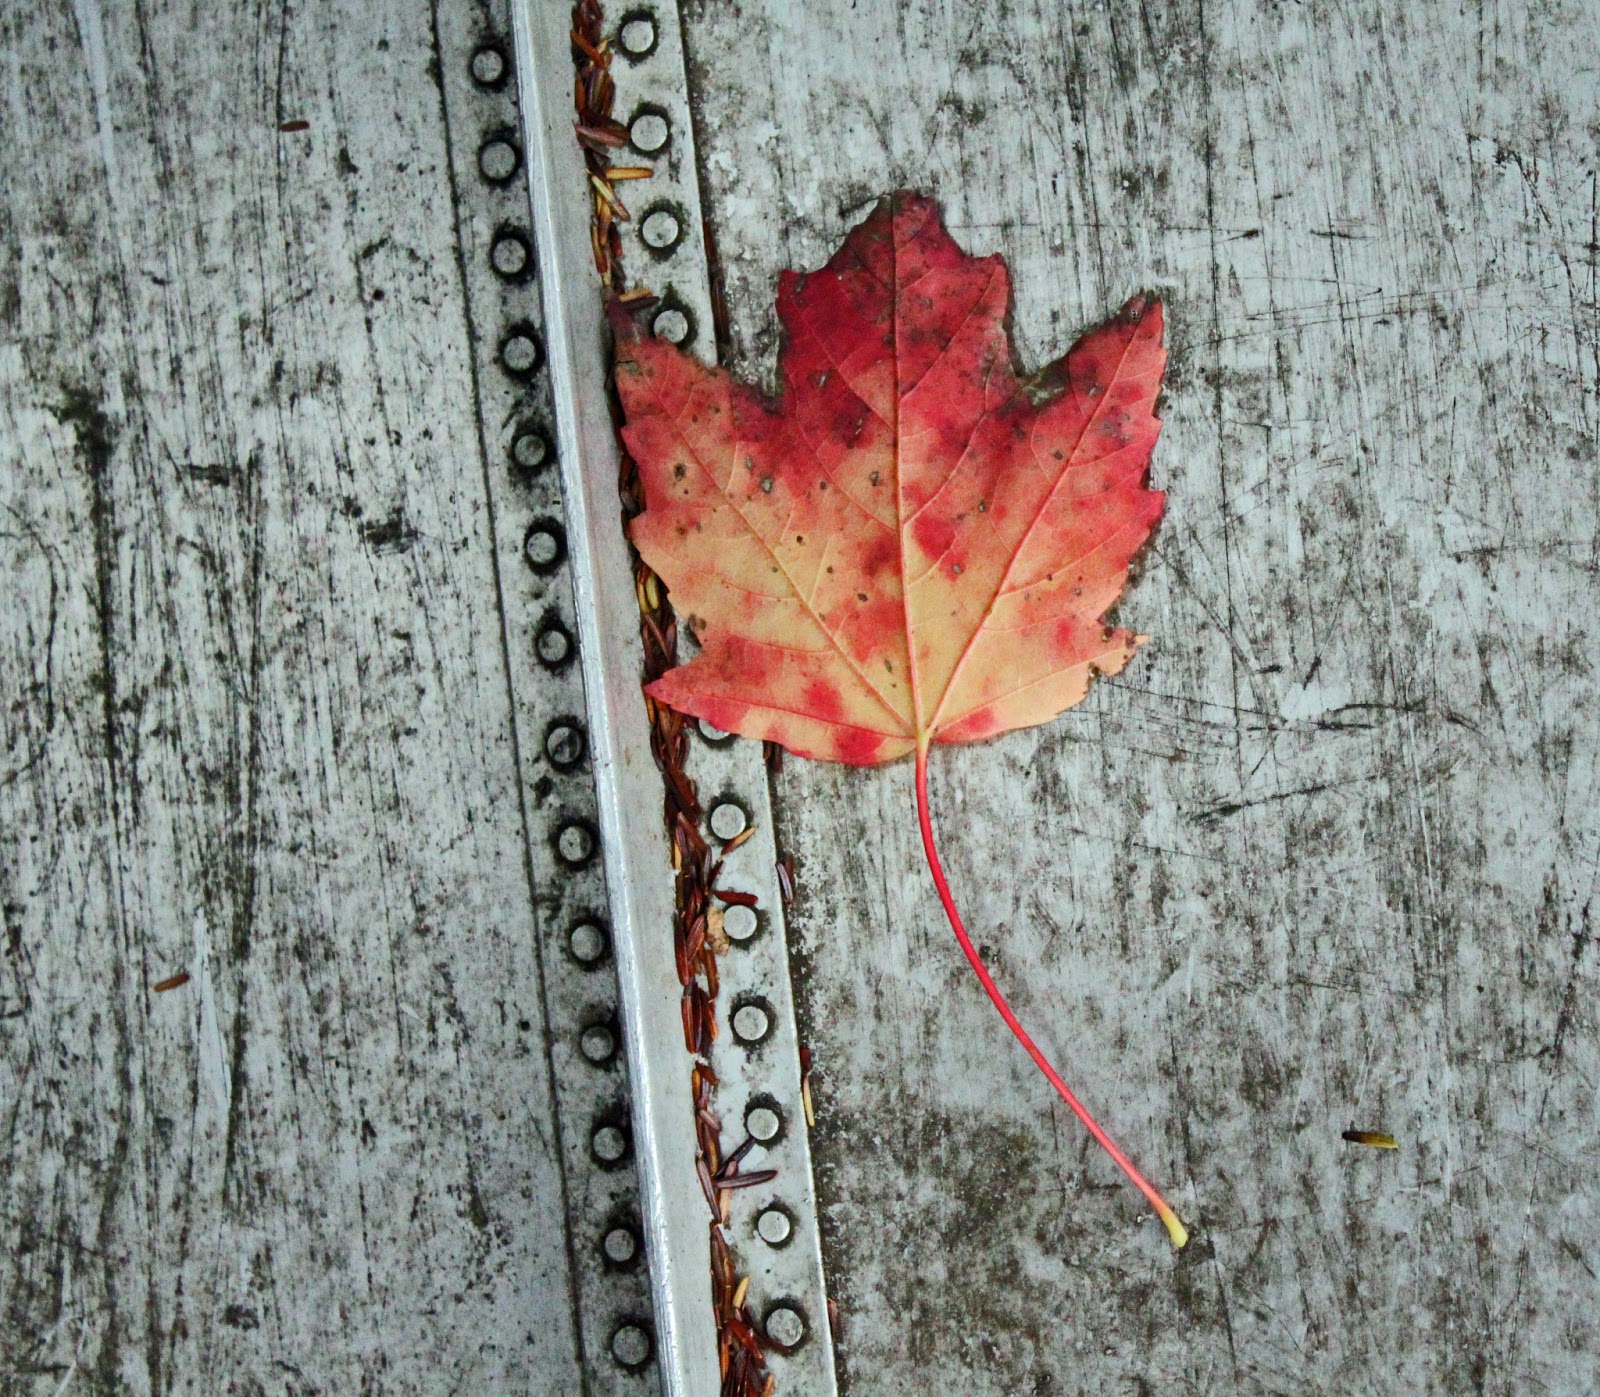
came out exceptional! The first picture I used natural light and a cloudy white 
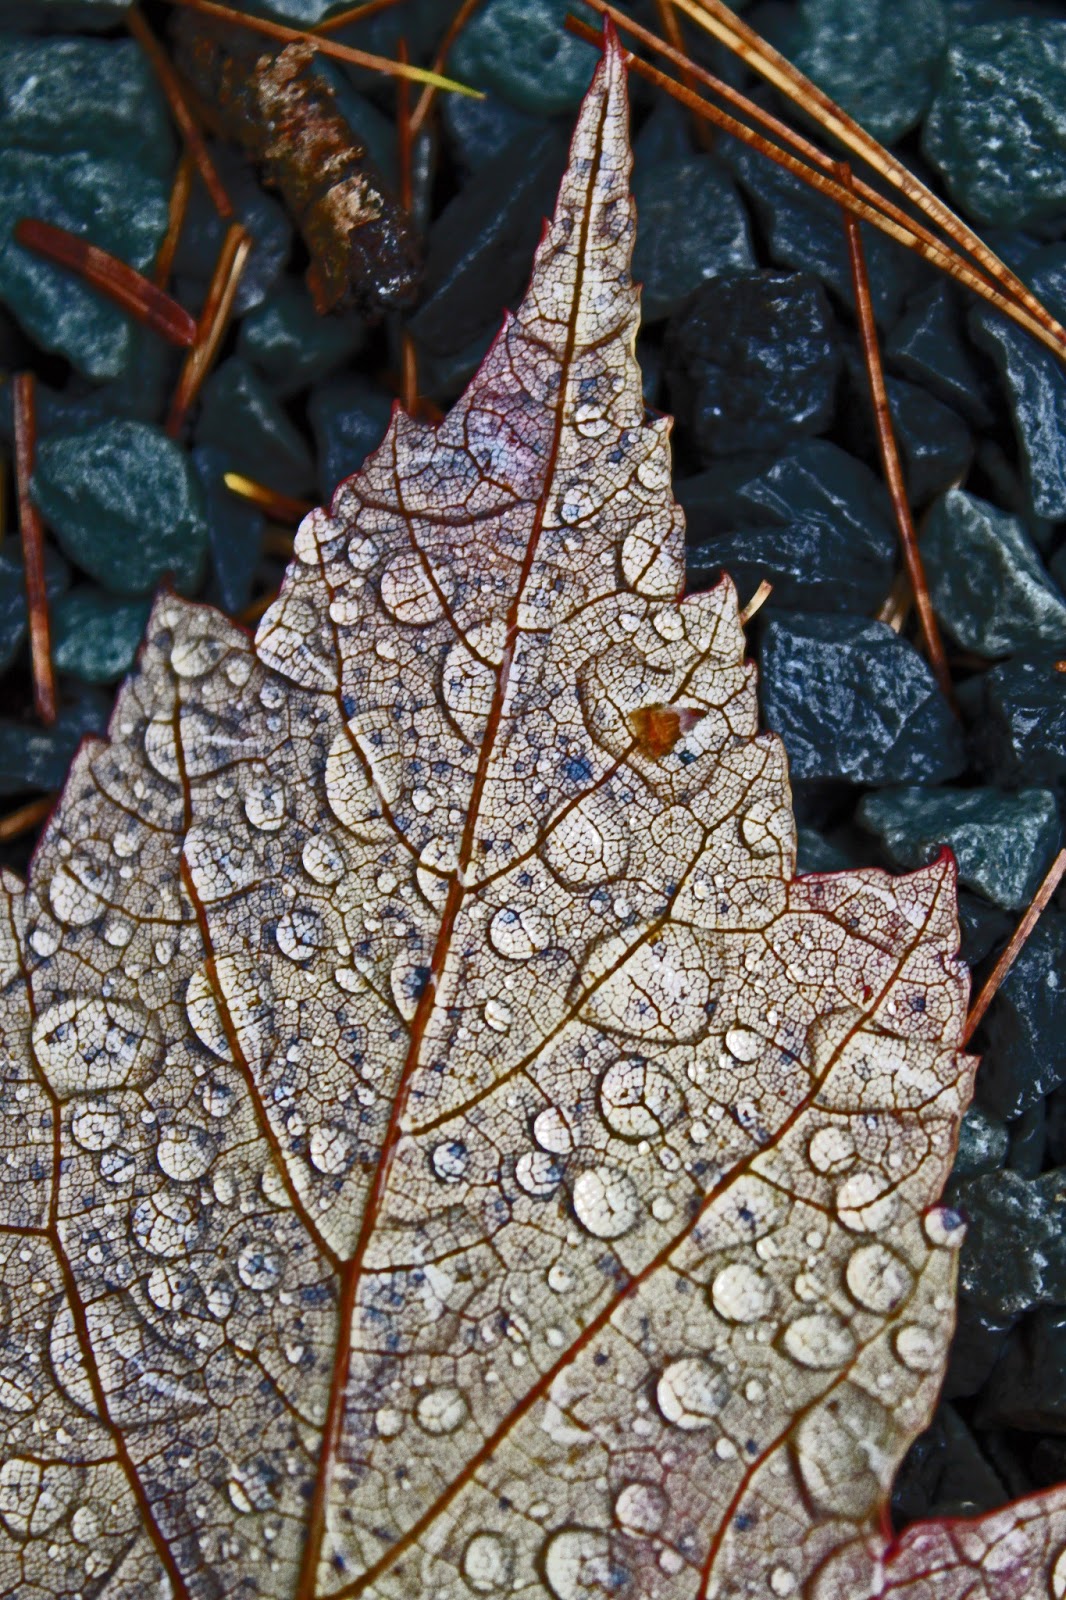
balance to get the clear color on cloudy day. In the second picture I lowered my Iso and aperture to make most of the leaf to be in focus and let less light in for more sharpness. With the third picture I raised my Iso setting so I could focus on a midpoint in the leaves and have the rest of the path be out of 
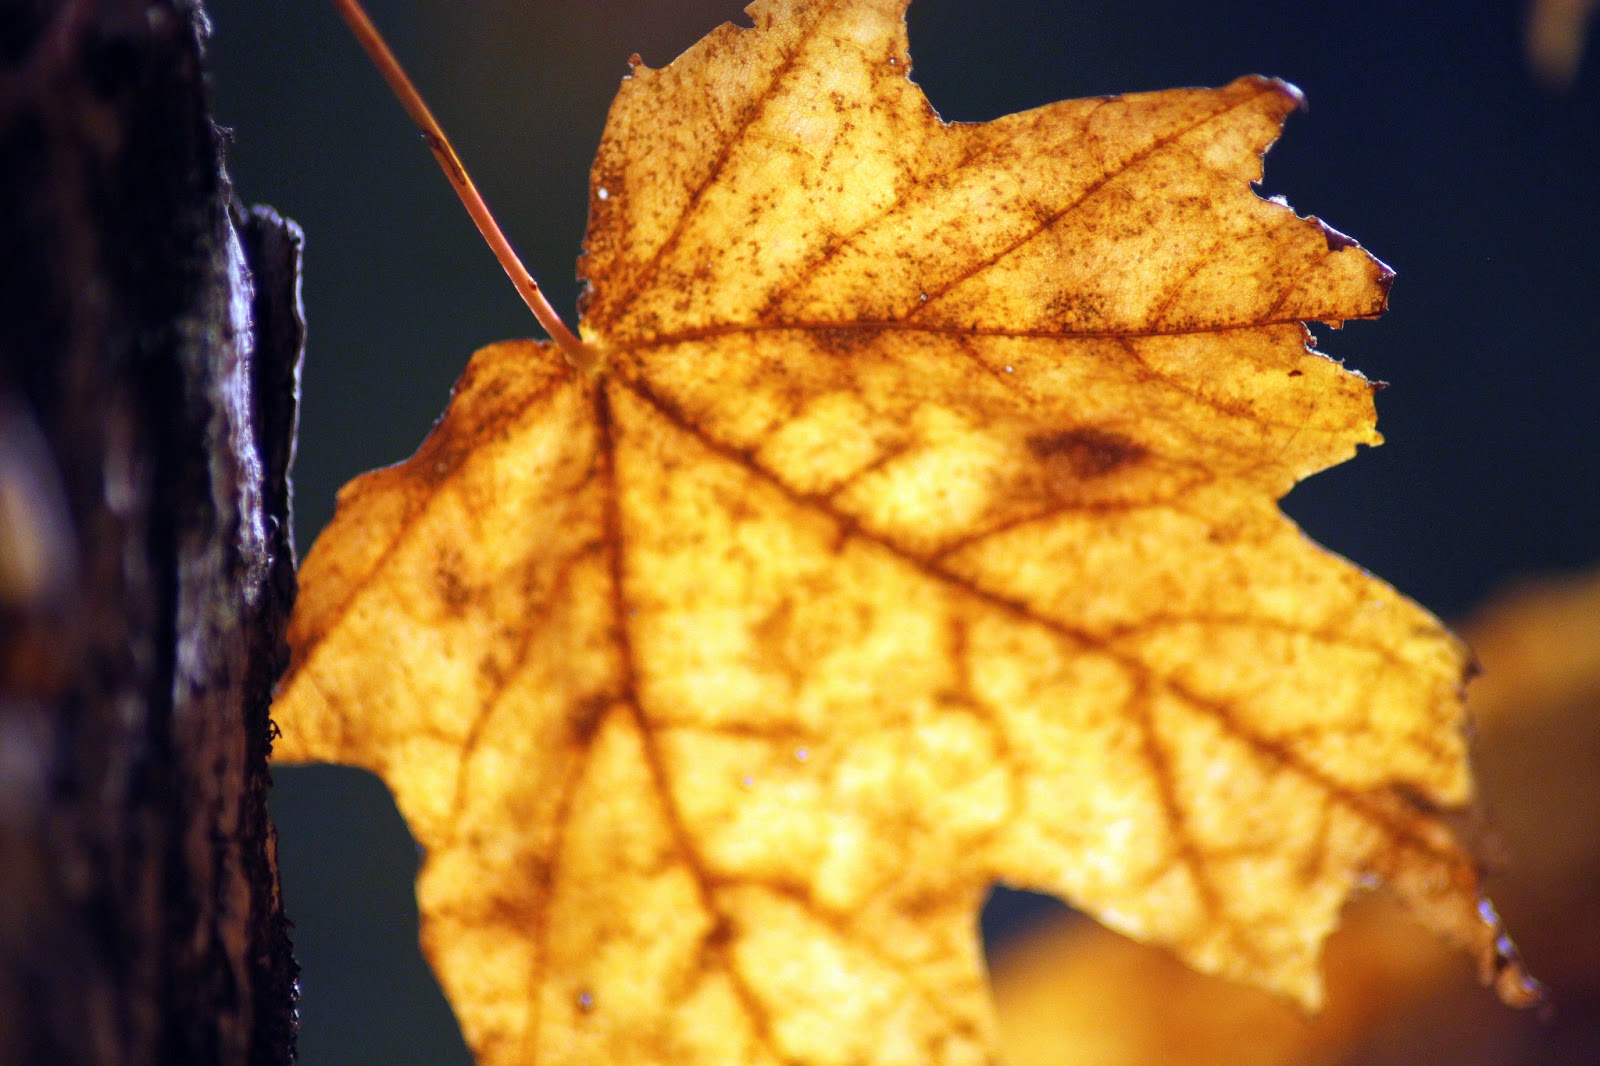
focus. In the fourth picture (and my favorite) I used natural back light and a higher Iso to get the great lighting effect. This shot I believe came out beautifully! 
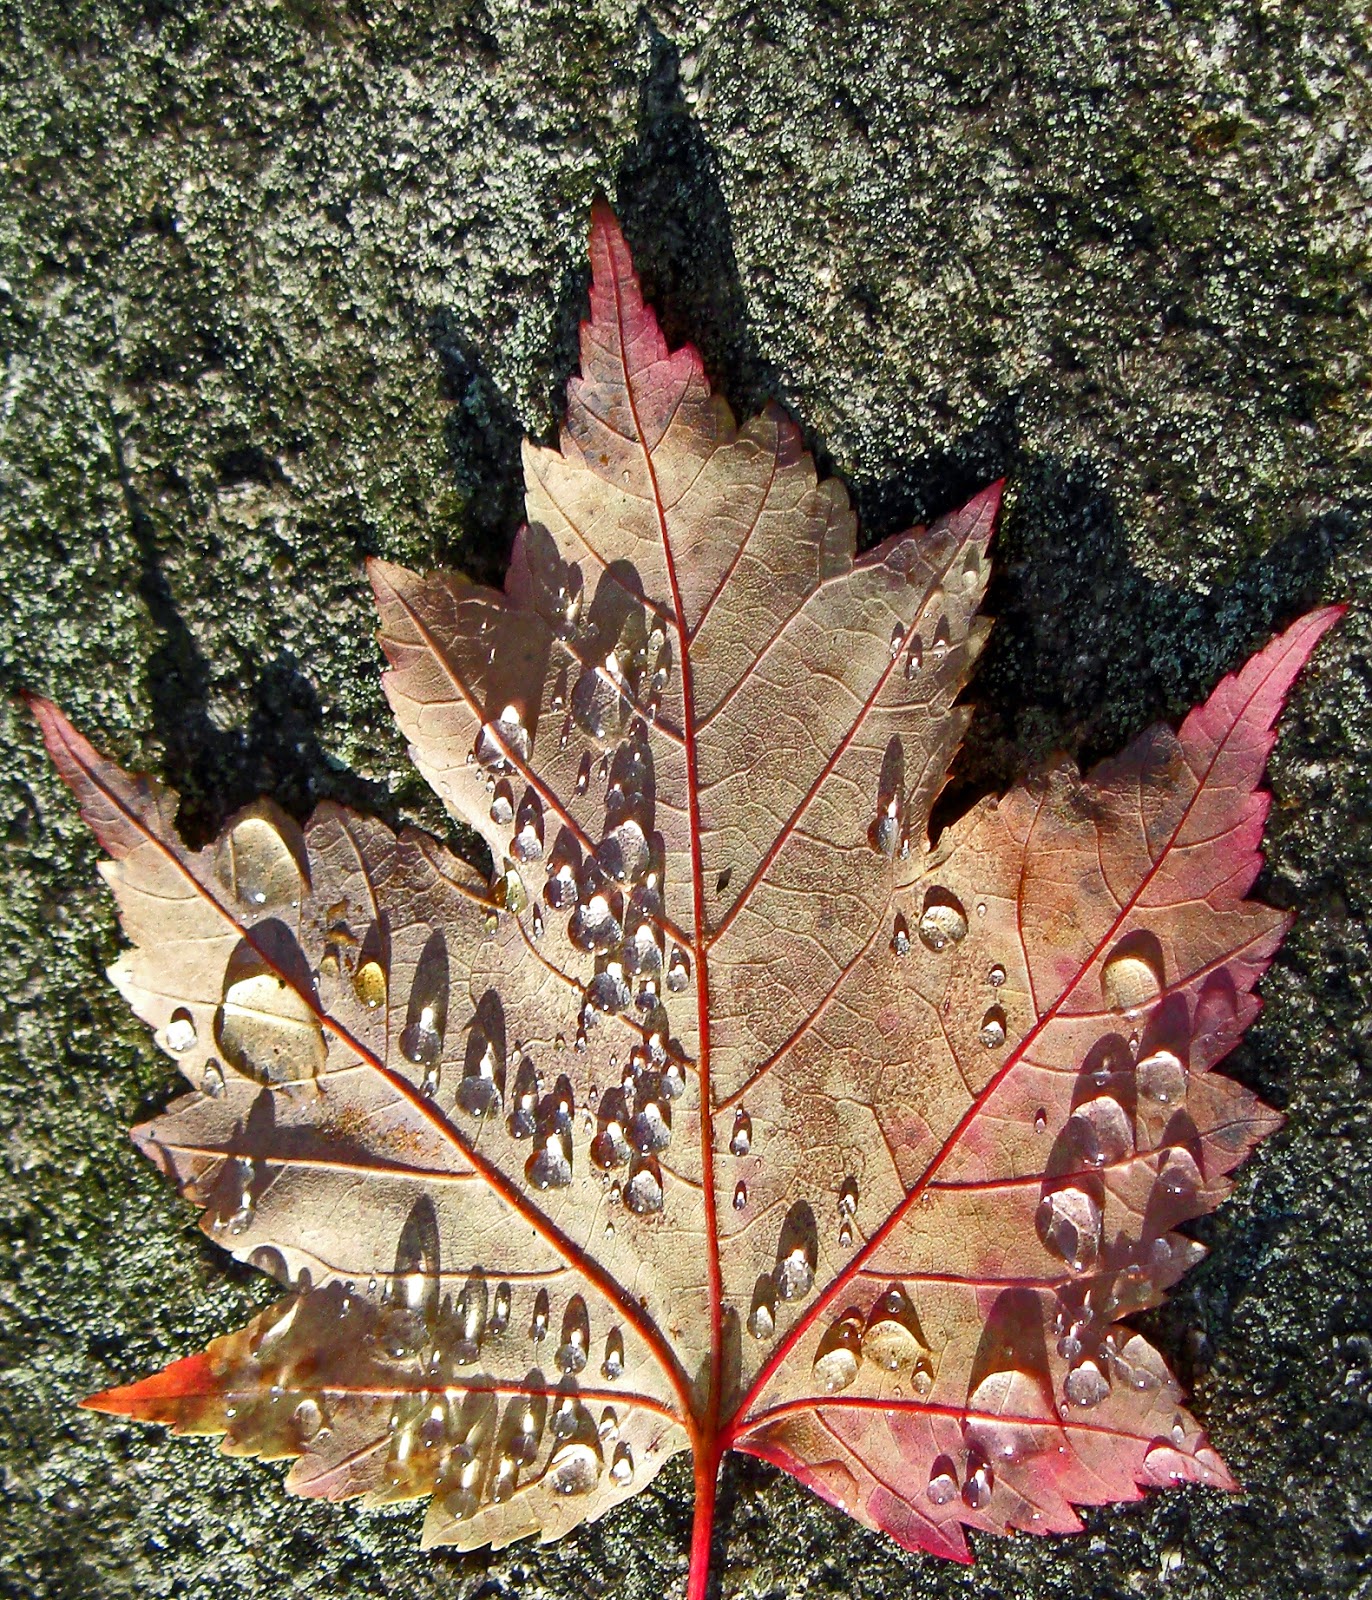
The fifth shot I was trying to play on shadows, I adjusted Iso, exposure, and aperture to get the longer shadows I got on the leaf. I had a lot of fun taking these photos and I learned a tremendous amount about my own talent during the exercise.
                Along with the blog work and the reading of the course information and personal research, I really do believe that this course has given me the tools and information necessary to move onto bigger and better things. I’ve taken many courses over the years and I don’t think I’ve had such a strong learning experience in a single class like I have with this one. Now I feel like I can take gorgeous shots with my camera that not only I will enjoy but that everyone will enjoy. I’m actually sadden to know that this is the final lesson, but I know that I will take everything I learned along with my in all my future endeavors with photography. They always say you have to have a strong base in anything to go
anywhere!


Sunday, December 9, 2012

Portrait/Black and White


Let me start off by saying that Portrait and Self-Portrait photography are not my favorite. Nor are they my strongest area. I guess I would rather work with inanimate objects or still life. I do like voyeur style photography, but I find the setup or staged portrait photography a little boring. In my opinion any way! I love the shots other people can get with studio work or being creative with people, but it’s just not for me. It may be I need to learn more or study more about the area. On the other hand, I really love black and white photography. I think the absence of color can make pictures very dramatic and keep the viewer thinking deeper about the picture. I liked how composing the shot with thinking about how no color would affect the pictures. I’ll break down how I went about composing my shots.
                For the portraits and self-portraits I went about it as a outside person. Trying to think about what others would like and be engaged by. Most of my shots are taken in nature since I love nature photography so much. I like the aspect that nature brings to pictures. I tried to focus on the person while providing some interesting background without letting it clutter the picture. I’m not going to lie, I spent more time trying to compose the black and white pictures then I did the portraits. I overall thought my portrait photographs lacked personality, and me being my own biggest critic, hated them.
                However I really did love how my black and white pictures came out. I like the contrast in darkness and light I got. I waited to late afternoon to get some interesting shadows and tones in the pictures. I found subjects that had a range of dark and light areas and tried to play on them with the camera. I actually took 3 times as more black and white photographs as the ones I did for the portraits, which gave me much more to work with. One of my biggest inspirations in my photography creative eye is Ansel Adams. I love how his photography controls the image and the viewer and draws them into his world. He is a master of both landscape and black and white photography.


                Overall my pictures came out ok for this assignment. I guess the lesson I learned the most was learn what you like, and try to improve what you don’t. I now know I have to learn more about portrait photography and that I love and I believe have a great eye for black and white photography. The best thing about learning the basics of photography is learning what you like, and understanding how to do it. This class has helped me grow as a photographer and understand myself and the strengths of my photography. Going forward I will have a great understanding of how to compose portraits and learn what to focus on and off of. As far as the black and white photography, I’ll keep pushing the envelope and trying to get more out of my shots.

Sunday, November 25, 2012

Composition


Continuing on the theme of rules, we now have the rule of composition; well really I would say the absence of a rule on composition.  The composition of a shot can be as planned as you want or as spur of the moment as the moments do present themselves. It can take weeks to setup a correct composition to the shot and can be a very daunting task. However you can also create beautifully composed shots in the blink of an eye.  It depends a lot on what you’re photographing, and the style of image you’re going for. When I was taking my composition shots I was trying to think about the focal of the picture and the things in relationship to the focal point. I would walk around a focal point and try to see which angle was the best composition. Also I think sometimes we get caught up with the distance and height to an image. Don’t forget you can get closer, farther away, above and below the focal to change your composition. Try not to become one dimensional and only photograph things as you think other people would see them. Part of photography is to push others into your way of thinking.
There is no right or wrong when it comes to composition, but you can fall far from the public interest if you compose your shot on the wrong thing or capture a not-as-meaningful picture. It’s not that your picture isn’t as good as the next; it could be that the viewer just doesn’t connect with your composition. That can happen with any aspect of photography and can be a hindrance to photographers that try to please other people with their pictures. I think you have to be able to take your mind out of the picture and just shoot what feels right. I think a lot of the times I over think a composed picture and it can take away from the life of the picture. I like having pictures that are spur of the moment and on a whim. However I also like landscape photography and it can take a while for the right shot to present itself there.
So what am I trying to say? Love what you do and take some time to plan out your shot and also be sure to (since we’re mostly digital now) snap away! I appreciate both facets of composition, the composed shots and the click clicks of the spur of the moments and I think that it’s important to have both in your bag of photography tricks. You don’t necessarily have to decide which path you’re closer to, as long as you know how to do both. Also remember even if your shot isn’t perfectly composed at first, there are always post editing and many programs out there that can help you compose them afterwards. You don’t always see the magic in your pictures as soon as you take them. Sometimes it takes a larger screen and another look!

Sunday, November 11, 2012

Rule of Thirds


Every rule made was meant to broken, and over time has been. There are some made for our safety and others made for our benefit. However when it comes to photography these rules are more like a hazy line then something strictly enforced by the photograph police! The rule of thirds is a way of looking at pictures so they better catch our audience. However this rule is more of a concept then a specific rule. I find taking shots purposely to break the rule is artistic and creative. I also believe that the rule gives us great boundaries and can lead to particularly awesome shots. So which way is correct? No one really knows because photography in the long run is art. And who is to say that one form is better than the other?
          So to further explain the rules of thirds there is one basic component to remember…you already know it! Most people view their pictures in the rule of third because most photography we see in advertisements and in media is setup that way. So we have an inclination to automatically view our shots that way. The rule is that every picture is broken up into nine segments, basically turning the photograph into a graph. The basic principle of thought is to line up your photograph with the idea to have the focus on your image intersect one of the lines in the grid. It’s meant to make the picture be compromised to pull the viewer into the picture. It actually works! I took a series of pictures and showed them to my family and asked them to comment on which ones they liked better. They all chose the picture that followed the rule of thirds. I thought it was a pretty good experiment even if the median age was 15. I also reviewed a lot of pictures I had taken in the past before this class and was surprised in most of them I could apply the rule. Also surprising I had pictures that were some of my favorites that didn’t follow the rule.
I could be labeled as a rule breaker, and some of my teachers in the past may say I was, but I don’t feel bad about breaking or following this rule. I think it has both benefits and downfalls. The two that come to my head immediately is the benefit of the rule to make a composed and inviting picture and the benefit of not following the rule is a picture that is still engaging because of the different point of view the picture supplies. A downfall for both is that overthinking them could limit your creativity! So don’t worry about it too much, and start clicking! All in all I think it’s a wise move to understand the rule of the thirds and know how to apply it to your photographs and how to remove it also. You can always remove post production too if you find that you are already too brainwashed and your pictures come out in the rule!

Sunday, October 28, 2012

In Camera Flash


Natural light will always win over artificial light. However there will be times when you need that built in flash, or that big external flash. It’s just the beast of burden; the sun eventually goes down and leaves you with only darkness. Personally I hate using flash. For me, when I use a flash, the pictures look artificial. You can tell the flash went off. You get a weird glow on the pictures and it makes everything look way to bright. There are two different styles of flash that I used; a built in flash, and a external flash mounted to the camera.
 Well after this lesson about flash I’ve learned a thing or two about my camera’s flash. I’ve learned it can be a great filler during the day taking portraits or macro pictures. I also found out that I can use a variety of different techniques to change the position and brightness of the flash. One of the best tools I’ve been using along with the built in flash is a diffuser. If you don’t have one of these in your collection now, you should go out and buy one! It can be a life saver if you need to find that perfect blend between a strong flash and a soft light in the picture. The diffuser works exactly like how it sounds. It slips in front of your flash and makes the flash light pass through a diffusing screen which dampens the effects of the flash. This can create some unique and creative pictures. Another technique is using a bounce or swivel flash to change the origination of the flash. This can make it so you actually fire the flash at the ground or ceiling instead of directly at your subject. The can create some intense and very fun shadows. I also played around with reflective screens and light enhancers. This created a stronger brighter flash to get rid of any shadows on the subject. This can also be achieved by using multiple flashes on stands and have them be fired by one master flash. For most setups this will require an expensive flash mounted on the camera, and then any flash that can be used as a slave. The slave portion just means that the flash is fired when the master flash goes off. Using this technique is a great way to get a completely lighted subject and is better used in a stationary studio.
While I now understand how to use flash more and I feel like I have a good understanding of what I would need to use one for great pictures, I still prefer natural light. Although, being able to understand all of your options and how to use them is a priceless lesson. You never know when you will need more light, even during the day time! I was really surprised with how a flash can be used for a filler even during the day. So my suggestion is to experiment and see how you like using your built in flash, what do you have to lose!?